In This Article
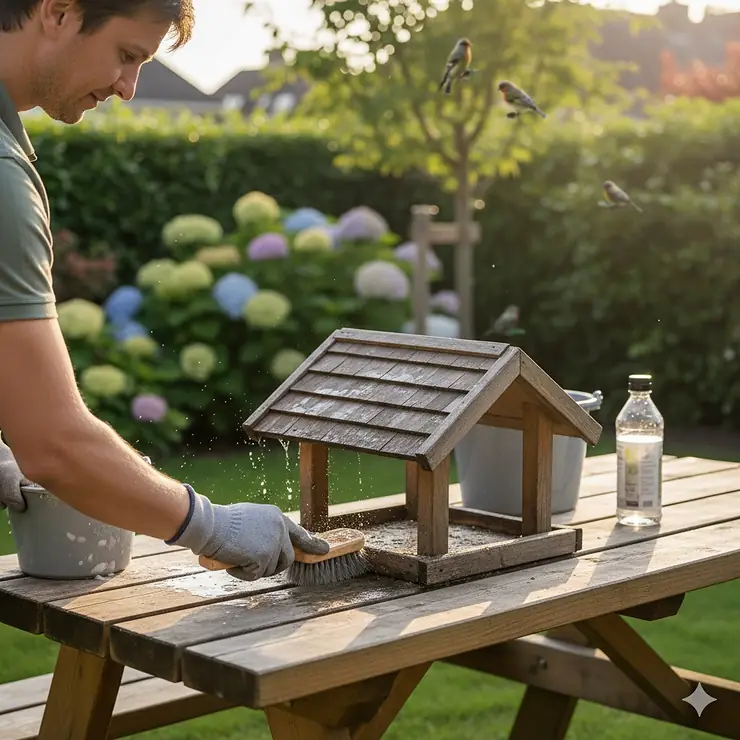
Last winter, I watched a Pine Siskin sit motionlessly at my feeder, eyes closed and feathers puffed out. It didn’t fly away when I approached. That heartbreaking moment taught me something every bird lover needs to know: dirty feeders can be deadly.
According to Cornell Wildlife Health Lab research, salmonellosis outbreaks at bird feeders have caused significant mortality across North America, particularly affecting finches and siskins. The bacteria spread through contaminated food and water at feeders, turning our well-intentioned feeding stations into disease transmission sites. But here’s the good news: knowing how to clean bird feeder properly can prevent these tragedies entirely.
Whether you’re dealing with seed feeders, suet holders, or hummingbird nectar stations, cleaning isn’t just about aesthetics. It’s about bird survival. Mold, bacteria, and fecal contamination build up faster than you’d expect, especially during humid weather or high-traffic feeding seasons. The Cornell Lab of Ornithology recommends cleaning feeders every two weeks minimum, and more frequently during wet weather or disease outbreaks.
In this comprehensive guide, you’ll discover the exact tools, solutions, and techniques I use to maintain spotless feeders. We’ll explore seven essential products that make cleaning effortless, learn the proper bird feeder cleaning solution ratios, understand how often clean bird feeder schedules should be, master how to prevent mold in bird feeder setups, and get the correct disinfect bird feeder bleach ratio. Plus, I’ll share insider tips that transformed my backyard into a thriving, healthy bird sanctuary.
Quick Comparison Table: Top Bird Feeder Cleaning Products
| Product | Type | Key Feature | Price Range | Best For |
|---|---|---|---|---|
| Brushtech B122C Kit | Brush Set | 3-piece hummingbird kit | $18-$20 | Hummingbird feeders |
| JCs Wildlife Cleaner | Liquid Solution | Plant-based enzymes | $12-$15 | All feeder materials |
| Songbird SE603 Brush | Long Brush | 24-inch reach | $8-$12 | Tube feeders |
| Good Salt Pet Cleaner | Spray Formula | HOCl natural formula | $18-$22 | Quick cleaning |
| Outus Brush Set | Multi-Size Kit | 12-piece variety | $7-$10 | Ports & small areas |
| Classic Stokes Brushes | 2-Brush Set | Flexible nylon | $10-$14 | General cleaning |
| Microbe-Lift Cleaner | Soy-Based Spray | Biodegradable | $15-$18 | Eco-conscious users |
💬 Just one click – help others make better buying decisions too! 😊
Top 7 Bird Feeder Cleaning Products: Expert Analysis
1. Brushtech B122C Hummingbird Feeder Cleaning Kit
If you feed hummingbirds, this kit is non-negotiable. The Brushtech B122C includes three specialized brushes designed specifically for hummingbird feeder anatomy.
Key Specifications:
- Three brush sizes: 8.2-inch small, 14-inch medium, 8-inch ball-tipped
- Nylon bristles that won’t scratch glass or plastic
- Made in the USA
This kit excels at reaching those impossibly tight nectar ports where mold loves to hide. The ball-tipped brush tackles bottle interiors, while the smallest brush navigates feeding ports with surgical precision. Customer reviews consistently praise how thoroughly these brushes clean without damaging delicate feeder components.
Pros:
✅ Specifically designed for hummingbird feeders
✅ Durable bristles last multiple seasons
✅ Three sizes handle every feeder component
Cons:
❌ Smallest brush may be too large for some feeder models
❌ Higher price point at $19.79
The investment pays off when you see crystal-clear feeders that hummingbirds actually prefer. One user reported their feeders “sparkle now” after years of struggling with inadequate cleaning tools.
2. JCs Wildlife Bird Feeder Cleaner 16 oz
This enzyme-based bird feeder cleaning solution represents a safer alternative to bleach for regular maintenance. JCs Wildlife Cleaner uses plant-derived enzymes to break down organic residue naturally.
Key Specifications:
- 16-ounce concentrated formula
- Works on wood, plastic, metal, and ceramic
- Enzyme-based, non-toxic formulation
The formula naturally degrades seed oils, mold, and water stains without harsh chemicals. I use this weekly between deep bleach cleanings. It’s particularly effective on wooden feeders where bleach can cause damage. The spray bottle design makes application effortless.
Pros:
✅ Safe for all feeder materials
✅ No harmful chemical residue
✅ Manufactured in the USA
Cons:
❌ Requires longer contact time than bleach
❌ May need scrubbing for stubborn buildup
Price typically ranges from $12-$15, making it an economical choice for regular maintenance. Customers appreciate that it’s safe for birds when used as directed, with no restrictions for wildlife.
3. Songbird Essentials SE603 Best Long Bottle Brush
Tube feeders present unique cleaning challenges with their narrow dimensions and considerable length. The Songbird Essentials SE603 solves this with its impressive 24-inch reach.
Key Specifications:
- 24-inch total length with 1.5-inch diameter bristles
- Bendable wire body for maneuvering
- Synthetic nylon bristles prevent scratching
This brush reaches the absolute bottom of even the longest tube feeders. The flexible wire core lets you angle around baffles and perches, while the molded plastic handle provides comfortable grip during vigorous scrubbing. It’s become my go-to tool for weekly tube feeder maintenance.
Pros:
✅ Exceptional length for deep feeders
✅ Flexible design navigates obstacles
✅ Bristles won’t damage polycarbonate
Cons:
❌ Single brush limits versatility
❌ Bulkier storage requirements
At $8-$12, this specialized brush delivers outstanding value. Users consistently mention how much easier cleaning becomes once you have the proper length tool.
4. Good Salt Pet Bird Feeder & Birdhouse Cleaner 32 oz
For those seeking a quick spray-and-wipe solution, Good Salt Pet Cleaner offers convenience without compromising effectiveness. This formula uses hypochlorous acid (HOCl), created naturally from salt, water, and electricity.
Key Specifications:
- 32-ounce spray bottle
- HOCl natural cleaning compound
- All-natural, fragrance-free formula
HOCl provides powerful antimicrobial action while remaining completely bird-safe. I keep this handy for spot-cleaning between deep cleans, especially on platform feeders that accumulate droppings. The spray dries quickly, allowing you to return feeders to service within minutes.
Pros:
✅ Quick application saves time
✅ Natural formula with no harsh chemicals
✅ Effective on dried-on grime
Cons:
❌ Higher cost at $18-$22
❌ Some users question ingredient transparency
Recent reviews from February 2025 note the manufacturing date on bottles, confirming fresh product. While slightly pricier, the convenience factor makes it worthwhile for busy bird enthusiasts.
5. Outus Hummingbird Feeder Cleaning Brush Set – 12 Pieces
Variety matters when tackling different feeder designs. The Outus 12-Piece Set provides multiple brush sizes for comprehensive cleaning coverage.
Key Specifications:
- 6 long brushes (6.7 inches) and 6 short brushes (3.9 inches)
- Nylon bristles with plastic handles
- Bulk quantity for replacements
This set shines when you maintain multiple feeders or need frequent brush replacement. The shorter brushes excel at cleaning feeding ports and bee guards, while longer ones handle bottle interiors. Having extras means you’re never caught without a clean brush.
Pros:
✅ Excellent value at $7-$10 for 12 pieces
✅ Two sizes cover most cleaning needs
✅ Sufficient quantity for seasonal replacement
Cons:
❌ Shorter bristle lifespan than premium options
❌ May be too small for large tube feeders
Customers appreciate the “sufficient quantity” that ensures they always have clean brushes ready. The flexible, soft bristles won’t scratch even the most delicate feeder surfaces.
6. Classic Brands Stokes Feeder Cleaning Brushes (38293)
Sometimes simple tools work best. The Classic Stokes Brushes offer straightforward functionality in a two-brush configuration that handles most common feeders.
Key Specifications:
- Two brush sizes: 13-inch and 20-inch lengths
- Twisted wire handles with nylon bristles
- 3-inch diameter cleaning head
I reach for these brushes first when dealing with standard tube feeders and platform feeders. The longer 20-inch brush tackles deep tube feeders, while the 13-inch version manages bottles and shorter feeders. The twisted wire handles provide excellent grip even when wet.
Pros:
✅ Two versatile sizes cover common needs
✅ Sturdy construction lasts multiple seasons
✅ Easy-grip handles improve control
Cons:
❌ Occasionally shows as unavailable online
❌ Limited specialty features
Priced at $10-$14, these brushes deliver reliable performance without fancy features. Users particularly value how the longer brush reaches “down into long feeders” for thorough cleaning.
7. Microbe-Lift Soy-Based Bird Feeder Cleaner Spray – 32 oz
Environmental consciousness meets cleaning power in Microbe-Lift’s soy-based formula. This biodegradable cleaner tackles organic debris while remaining completely safe for surrounding ecosystems.
Key Specifications:
- 32-ounce spray bottle
- Soy-based, renewable formula
- Safe for all feeder materials including wood
The soy-based chemistry effectively breaks down organic matter, mineral deposits, and droppings without petroleum-based ingredients. This makes it ideal for cleaning near gardens, ponds, or sensitive areas. The formula won’t harm plants, soil, or water sources when rinsed.
Pros:
✅ Eco-friendly, biodegradable composition
✅ Works on all common feeder materials
✅ Non-toxic to birds and wildlife
Cons:
❌ Requires dilution for optimal use
❌ Mid-range pricing at $15-$18
This cleaner appeals particularly to environmentally conscious bird enthusiasts who want effective cleaning without environmental impact. The sustainable soybean sourcing aligns with conservation values many birders hold.
Understanding Bird Diseases Linked to Dirty Feeders
The relationship between feeder cleanliness and bird health cannot be overstated. Cornell Wildlife Health Lab has documented numerous salmonellosis outbreaks directly linked to contaminated feeding stations. These outbreaks cause significant mortality, particularly among Pine Siskins, Common Redpolls, and American Goldfinches.
Salmonellosis spreads through fecal contamination of food and water. Infected birds appear lethargic, puffed up, and often sit motionless with closed eyes. The bacteria can survive in wet, warm conditions for extended periods, making bird feeders ideal transmission sites during certain weather conditions. In 2020-2021, the Centers for Disease Control and Prevention (CDC) documented the first outbreak where Salmonella in wild songbirds was directly linked to human illnesses, emphasizing the critical importance of proper feeder hygiene for both bird and human health.
Beyond salmonella, house finches commonly contract mycoplasmal conjunctivitis, causing swollen, crusty eyes. While this disease spreads primarily at roosting sites rather than feeders, maintaining clean feeding stations helps reduce overall disease pressure in bird populations.
According to research published by the Cornell Lab of Ornithology, proper feeder hygiene significantly reduces disease transmission risk. The U.S. Fish & Wildlife Service emphasizes that while bird feeding provides benefits for both birds and people, it comes with responsibility to minimize disease risks through regular cleaning—at least once every two weeks, with increased frequency during wet weather or if sick birds appear.
The Science Behind Bird Feeder Cleaning Solution Formulations
Understanding how different cleaning solutions work helps you choose the right approach. Three main categories exist: chemical disinfectants, enzyme-based cleaners, and natural acids.
Chemical Disinfectants
Bleach remains the gold standard for deep disinfection. The proper disinfect bird feeder bleach ratio is one part bleach to nine parts water (roughly 10% solution). This concentration effectively kills bacteria, viruses, and fungi without leaving harmful residue when properly rinsed.
The Cornell Lab of Ornithology specifically recommends soaking feeders in dilute bleach solution for 10 minutes as highly effective. Research demonstrates this kills pathogens while remaining safe for birds after thorough rinsing and air drying.
Enzyme-Based Cleaners
Products like JCs Wildlife Cleaner use plant-derived enzymes to break down organic matter naturally. These enzymes target proteins, fats, and carbohydrates found in seed oils, mold, and bird waste. They work more slowly than bleach but avoid harsh chemical exposure.
Enzyme cleaners excel for regular maintenance cleaning, particularly on materials sensitive to bleach like wood or copper. They’re also safer for immediate handling without gloves.
Natural Acids
White vinegar offers a gentler alternative with antimicrobial properties. A solution of one part vinegar to four parts water creates an acidic environment hostile to bacteria and mold. While less powerful than bleach, vinegar works well for weekly maintenance between deep cleans.
The acidity cuts through seed hull grease and mineral deposits effectively. After treatment, vinegar evaporates completely, leaving no harmful residue. However, it requires longer soaking times for stubborn contamination.
How to Prevent Mold in Bird Feeder: Expert Strategies
Mold prevention starts with understanding what mold needs to thrive: moisture, warmth, and organic material. Bird feeders provide all three in abundance, making prevention crucial.
Location Strategies
Position feeders in areas with good air circulation and partial sun exposure. Morning sunlight naturally dries feeders, inhibiting mold growth. Avoid placing feeders under dense tree canopies where moisture lingers.
Consider installing rain guards or baffles above feeders. These simple additions dramatically reduce water infiltration during storms. For hummingbird feeders, shade actually helps by slowing nectar fermentation, but ensure adequate air flow remains.
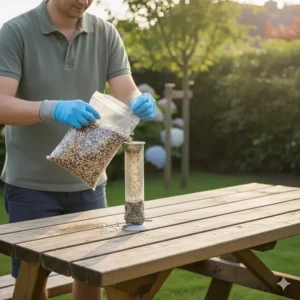
Seed Management
Never overfill feeders. Seed sitting for weeks becomes stale and moisture-prone. Calculate how much your birds consume in 3-5 days and refill accordingly. During humid summer months, reduce quantities further.
Choose high-quality seed with minimal dust and debris. Cheap seed mixes contain excessive filler that birds reject, leaving it to decompose in feeders. The upfront cost difference pays dividends in reduced cleaning frequency.
Design Considerations
Select feeders with drainage holes that allow rainwater to escape. Tube feeders should have seed deflectors preventing accumulation at the bottom. Platform feeders benefit from mesh or screen bottoms that don’t trap moisture.
Metal and plastic feeders resist mold better than wood. However, wooden feeders properly sealed and maintained develop attractive patina without harboring mold if cleaned regularly. Cedar and redwood contain natural antimicrobial properties.
Nectar Feeder Specifics
Hummingbird nectar ferments rapidly in warm weather, creating ideal mold conditions. Change nectar every 3-5 days during moderate temperatures, increasing to every 2 days when temperatures exceed 80°F. Even crystal-clear nectar can harbor bacteria before visible mold appears.
Clean nectar feeders with hot water and bottle brush after each refill. The residual sugar film feeds mold growth if allowed to accumulate. Every few fills, do a complete disinfection with dilute bleach solution.
How Often Clean Bird Feeder: Seasonal Schedules That Work
Cleaning frequency depends on season, feeder type, usage level, and weather conditions. Here’s a practical schedule based on Cornell Lab recommendations and my personal experience maintaining 12 feeders year-round.
Winter Schedule (December-February)
Clean seed feeders every 2-3 weeks during normal weather. Increase to weekly during thaws or rain events when moisture infiltrates feeders. Suet feeders need less frequent cleaning, typically monthly unless visibly soiled.
Watch for disease outbreaks during winter, particularly affecting Pine Siskins during irruption years when northern birds flood southward. Project FeederWatch, a citizen-science initiative run by the Cornell Lab of Ornithology and Birds Canada, tracks these patterns and provides valuable data on bird health and distribution. If sick birds appear, immediately remove and disinfect all feeders, waiting one week before reinstalling.
Spring Schedule (March-May)
Increase cleaning frequency to every 1-2 weeks. Spring moisture combined with increasing temperatures accelerates mold growth. Migration peaks bring higher traffic, accumulating waste faster.
Hummingbirds return during spring, requiring nectar feeder cleaning every 3-5 days. As temperatures rise, shift to every 2-3 days for nectar stations.
Summer Schedule (June-August)
Summer demands peak vigilance. Clean seed feeders weekly minimum, increasing to twice weekly during hot, humid weather. Platform feeders accumulate droppings rapidly and may need cleaning every 3-4 days.
Hummingbird feeders require cleaning every 2 days when temperatures exceed 80°F. Nectar ferments quickly in heat, creating toxic conditions. Some enthusiasts clean daily during heat waves.
Fall Schedule (September-November)
Maintain weekly cleaning through fall migration. Large flocks moving through can overwhelm feeders quickly. Monitor weather carefully – warm, wet fall days create ideal mold conditions despite decreasing temperatures.
As freezing temperatures arrive, cleaning frequency can gradually decrease. However, maintain vigilance through Thanksgiving since disease transmission peaks when birds concentrate at limited food sources.
Step-by-Step Deep Cleaning Process
Let me walk you through my complete deep cleaning routine that keeps feeders spotless and birds healthy.
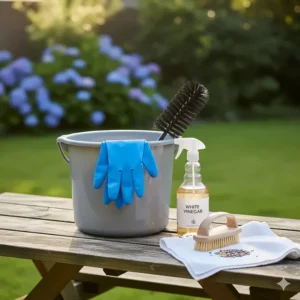
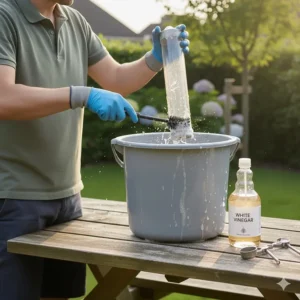
Preparation Phase
Gather all necessary supplies before starting: brushes appropriate for your feeder types, bucket for bleach solution, dish soap, spray nozzle, rubber gloves, and towels for drying. Work outdoors on a picnic table or driveway where mess isn’t problematic.
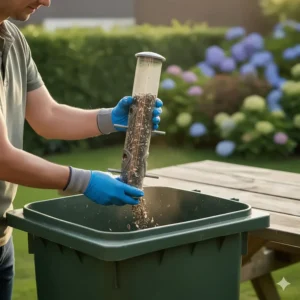
Remove all seed, nectar, or suet from feeders. Dispose of old seed in compost or trash – never refill without cleaning. For platform feeders, sweep up accumulated hulls and debris from ground below.
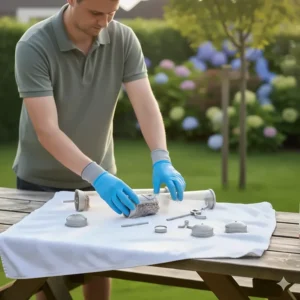
Disassembly
Take feeders completely apart. Remove perches, ports, bases, domes, and any removable components. This seems tedious but allows thorough cleaning of hidden crevices where mold lurks. Photograph complex feeders before disassembly if you’re unsure about reassembly.
Examine components for damage while disassembled. Cracked plastic, bent metal, or degraded wood compromises feeder function and creates bacteria harbors. Replace damaged parts before reassembling.
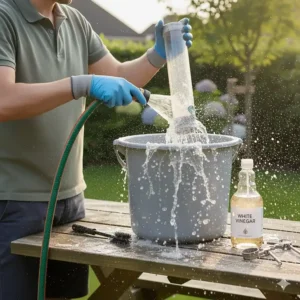
Initial Rinse
Spray all components with strong water stream to remove loose debris, seed hulls, and surface contamination. This preliminary rinse prevents you from scrubbing crud around unnecessarily. Pay special attention to corners, joints, and textured surfaces where material accumulates.
For particularly dirty feeders, let them soak in plain warm water for 10-15 minutes. This loosens stubborn residue, making subsequent scrubbing more effective.
Scrubbing Phase
Apply dish soap to brushes and scrub every surface thoroughly. Use appropriate brush sizes for different feeder areas – long brushes for tubes, small brushes for ports, and ball-tipped brushes for bottle interiors. Work soap into a lather to maximize cleaning action.
Don’t neglect the exterior. Birds perch on outside surfaces, depositing fecal matter that can contaminate food when it migrates inside. Scrub perches especially well since birds grip these with their feet.
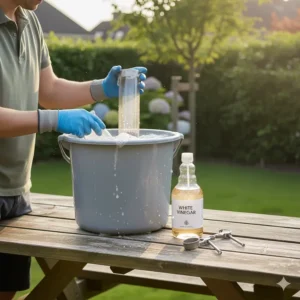
Disinfection Soak
Prepare disinfecting solution using the proper disinfect bird feeder bleach ratio: one part household bleach to nine parts water. Submerge all components in this solution for 10 minutes minimum. According to Cornell research, this exposure time effectively kills pathogens including salmonella.
For wooden feeders, reduce bleach concentration slightly (one part bleach to twelve parts water) and limit soaking to 5 minutes to prevent wood damage. Alternatively, spray wooden surfaces with bleach solution rather than fully submerging.
Final Rinse
Rinse all components exhaustively under running water. Bleach residue harms birds, so rinse until you can’t smell chlorine anymore, then rinse again. For tube feeders with narrow openings, fill and dump several times to flush interiors completely.
Some people perform a final rinse with white vinegar to neutralize any remaining bleach, though thorough water rinsing alone suffices.
Drying
Air dry feeders completely before refilling. Place components in sunny location or near fan to speed drying. Moisture trapped in reassembled feeders creates immediate mold conditions, negating your cleaning efforts.
For hummingbird feeders, I dry components separately then reassemble dry. This prevents water droplets from diluting fresh nectar.
Special Considerations for Different Feeder Types
Each feeder style presents unique cleaning challenges requiring tailored approaches.
Tube Feeders
Long narrow tubes demand specialized long brushes that reach the bottom. The Songbird Essentials 24-inch brush solves this problem elegantly. Start cleaning from bottom, working upward to push debris out the top opening.
Pay careful attention to seed ports where sunflower shells accumulate. These ports can clog completely, frustrating birds and encouraging waste. Small port brushes clear these efficiently.
Clean the small holes above seed ports that serve as ventilation. Clogged ventilation traps moisture, accelerating mold growth in stored seed.
Platform Feeders
These open designs collect droppings directly in feeding areas, demanding frequent cleaning. Remove platform from post for thorough scrubbing of both top and bottom surfaces. Wire mesh platforms can be scrubbed with stiff brushes then rinsed with hose spray.
Wooden platforms benefit from annual resealing with bird-safe wood preservative. This prevents moisture absorption that leads to warping and mold penetration.
Hopper Feeders
Hoppers protect seed from elements but can trap moisture if poorly designed. Empty completely before cleaning since seed wedged in corners goes stale and moldy. Use angled brushes to reach into hopper corners.
Remove perches and clean attachment points thoroughly. Birds defecate while eating, and droppings accumulate where perches attach to feeder body.
Suet Feeders
Suet melts in warm weather, coating wire cages with greasy residue that attracts insects and debris. Hot, soapy water cuts through suet film effectively. A stiff brush scrubs cage wires clean.
During summer, consider switching from suet to no-melt suet cakes or seed cylinders that don’t liquify. This reduces cleaning challenges while still providing high-energy food.
Hummingbird Feeders
These require the most frequent cleaning due to nectar fermentation. The Brushtech B122C kit specifically addresses hummingbird feeder anatomy. Don’t just rinse – actually scrub bottle interiors to remove invisible bacterial film.
Feeding ports accumulate mold rapidly in humid climates. The tiny port brushes in hummingbird cleaning kits navigate these narrow openings effectively. If ports develop black mold stains that won’t scrub out, soak them in full-strength white vinegar overnight.
Ground Feeders
These contact soil directly, picking up bacteria and parasites. Clean weekly minimum, disinfecting thoroughly between uses. Consider rotating ground feeding locations to prevent parasite buildup in soil.
Wire mesh ground feeders can be scrubbed then disinfected in bleach solution. Wooden ground platforms should be constructed from naturally rot-resistant woods like cedar.
Creating Your Personal Cleaning Station
Efficiency improves dramatically when you establish a dedicated cleaning area with organized supplies.
Location Selection
Choose an outdoor space with water access and good drainage. A utility sink in garage or basement works excellently for cold-weather cleaning. If cleaning outdoors, a patio area near garden hose provides ideal setup.
Avoid cleaning near vegetable gardens if using bleach solution. Runoff won’t harm ornamental plants but might affect edibles. Alternatively, collect cleaning water for disposal elsewhere.
Storage Solutions
Store cleaning brushes in a bucket or caddy near your cleaning station. Hang larger brushes on pegboard hooks to maintain bristle shape. Keep brushes completely dry between uses to prevent mildew.
Dedicate a spray bottle to feeder cleaning solution – don’t use bottles previously containing other products. Label clearly with contents and mixing date if storing diluted bleach (which loses potency over time).
Supply Inventory
Maintain adequate quantities of essential supplies: household bleach, dish soap, rubber gloves, scrub brushes in various sizes, spray bottles, buckets, and clean towels. Buy bleach fresh since it degrades – old bleach may not disinfect effectively.
Consider keeping a clipboard with cleaning schedule checklist. Track which feeders were cleaned when, noting any issues observed. This historical record helps identify patterns like feeders needing replacement or areas attracting particular problems.
Troubleshooting Common Cleaning Challenges
Even experienced bird enthusiasts encounter stubborn problems. Here’s how I solve common cleaning issues.
Impossible Black Mold Stains
Black mold sometimes stains plastic permanently despite thorough cleaning. These stains indicate deep penetration into plastic pores. While unsightly, sanitized stained feeders remain functionally safe for birds.
For valuable feeders worth saving, try soaking stained areas in straight white vinegar overnight. The acid can bleach out some discoloration. Alternatively, expose stained plastic to direct sunlight for several days – UV light naturally bleaches stains.
If staining recurs rapidly after cleaning, that feeder design likely traps moisture. Consider replacing with better-ventilated model.
Hard Water Mineral Deposits
White mineral scaling from hard water resists normal cleaning. Soak affected components in white vinegar for several hours. The acidity dissolves mineral deposits effectively. For stubborn scaling, heat vinegar in microwave before soaking (ensuring components are heat-safe).
Brass fittings on feeders develop green patina from mineral exposure. While not harmful, some prefer bright brass appearance. Metal polish restores shine, but ensure complete removal before birds contact treated surfaces.
Algae Growth in Hummingbird Feeders
Green algae slime develops in nectar feeders exposed to sunlight. Beyond looking disgusting, algae indicates serious contamination requiring immediate attention. Empty feeder, scrub with bottle brush, then disinfect with dilute bleach solution.
Prevent algae by relocating feeders to shadier locations or increasing cleaning frequency. Adding small amounts of shade cloth above feeders blocks enough sunlight to prevent algae while allowing hummingbird access.
Seed Hulls Cemented to Surfaces
Sunflower seed hulls mixed with rain create cement-like residue that resists scrubbing. Soak these areas in warm, soapy water for 20-30 minutes before scrubbing. For extremely stubborn deposits, carefully use plastic scraper to chip away buildup before scrubbing.
Platform feeders particularly suffer this problem. Choose platforms with drainage or mesh bottoms that don’t trap hull-water mixtures.
Ant Infestations in Clean Feeders
Discovering ants despite thorough cleaning frustrates everyone. Ants detect minute seed oil traces invisible to humans. Install ant moats filled with water on feeder poles – ants won’t cross water barriers.
For hummingbird feeders, apply food-grade grease bands around hanging wires, creating barriers ants cannot traverse. Never apply insecticides near bird feeding areas.
Budget-Friendly DIY Cleaning Solutions
Commercial cleaning products work wonderfully, but homemade solutions save money while performing effectively.
Basic Vinegar Solution
Mix one part white distilled vinegar with four parts water in spray bottle. This solution costs pennies per gallon and works for regular maintenance cleaning. Use for weekly cleanings between monthly bleach disinfections.
Vinegar cuts grease, inhibits mold, and leaves no harmful residue. The smell dissipates quickly as vinegar evaporates. Strengthen solution to equal parts vinegar and water for stubborn contamination.
Baking Soda Scrub
Create paste with baking soda and small amount of water for abrasive cleaning power without scratches. This mild abrasive removes caked-on debris while gentle enough for delicate surfaces.
Baking soda naturally deodorizes and provides some antimicrobial properties. It works especially well on wooden feeders where you want to avoid bleach. Rinse thoroughly since residual white powder isn’t attractive.
Salt Scrub
Coarse salt combined with lemon juice creates natural, abrasive cleaning paste. The salt provides scrubbing action while lemon’s citric acid breaks down organic residues. This works beautifully on heavily soiled feeders.
Use this method outdoors since it’s quite messy. The natural ingredients decompose harmlessly in gardens. Avoid using on metal components since salt can accelerate corrosion.
Hydrogen Peroxide Solution
Three percent hydrogen peroxide (standard drugstore strength) offers gentler disinfection than bleach while still killing bacteria effectively. Use straight from bottle for spot-cleaning or dilute 50/50 with water for soaking.
Peroxide breaks down into harmless water and oxygen, requiring less rinsing than bleach. However, it degrades in sunlight, so store in opaque bottle and replace periodically.
When to Replace Rather Than Clean
Sometimes cleaning isn’t enough – feeders need retirement.
Structural Damage
Cracks in plastic allow moisture penetration creating permanent mold reservoirs impossible to sanitize. Small cracks widen over time from freeze-thaw cycles. Replace cracked feeders promptly rather than battling recurring contamination.
Bent or broken perches create sharp edges potentially injuring birds. Wooden perches splitting or rotting compromise bird footing. These safety issues warrant immediate replacement.
Persistent Contamination
If thorough cleaning and disinfection don’t eliminate recurring mold, the feeder design is flawed or damage exists allowing moisture intrusion. After three cleaning cycles without improvement, replace that feeder.
Persistent staining despite cleaning suggests plastic degradation. Aged plastic becomes porous, harboring bacteria in microscopic crevices. Modern plastics resist this better, so replacement often solves the problem.
Design Obsolescence
Older feeder designs lack modern features like proper drainage, easy disassembly, and adequate weather protection. If cleaning a feeder consumes excessive time due to poor design, upgrade to better-engineered model.
Many budget feeders sacrifice cleanability for low price. Investing in quality feeders with removable bases and accessible interiors pays dividends through easier maintenance and longer lifespan.
FAQ: Your Most Common Bird Feeder Cleaning Questions Answered
❓ What happens if you don't clean bird feeder regularly?
❓ Can I use dish soap to clean bird feeder?
❓ How long should you soak bird feeders in bleach?
❓ Is vinegar or bleach better for cleaning bird feeders?
❓ Should I clean bird feeder with birds watching?
Conclusion: Creating a Sustainable Cleaning Routine That Actually Works
Transforming bird feeder maintenance from dreaded chore into manageable routine requires just two things: proper tools and consistent scheduling. The seven products featured in this guide eliminate the friction that makes cleaning feel burdensome. When you have the right brush reaching the right spot, cleaning becomes quick and even satisfying.
Start simple if you’re feeling overwhelmed. Pick one day weekly – I choose Sunday mornings with my coffee – for quick maintenance cleaning with enzyme cleaner. Then schedule monthly deep cleaning with bleach disinfection. Mark these on your calendar like any important appointment. Consistency matters more than perfection.
Remember that clean feeders benefit birds profoundly. Every time you scrub away mold or disinfect contamination, you’re literally saving bird lives. Disease outbreaks devastate local populations, but proper sanitation breaks transmission chains before they start. Your effort matters.
The birds will thank you in their own way. Clean feeders attract more species and higher numbers. Birds recognize safe, reliable food sources and return faithfully. You’ll notice increased activity, more diverse visitors, and healthier-looking birds once you establish solid cleaning practices.
Invest in quality cleaning tools now – brushes designed specifically for feeder cleaning last for years while making maintenance dramatically easier. The upfront cost proves negligible compared to hours of frustration with inadequate tools. You deserve equipment that works properly.
Finally, don’t let guilt paralyze you. If you’ve neglected feeder cleaning, simply start fresh today. Remove feeders, clean thoroughly following the steps outlined here, and commit to a better routine going forward. Birds are remarkably resilient and quickly forgive past neglect once conditions improve.
Your backyard birds depend on you for safe, clean feeding opportunities. With the knowledge, tools, and techniques shared in this guide, you’re fully equipped to provide exceptional care. Now get out there and give those feeders the cleaning they deserve!
Recommended for You
- 7 Best Winter Bird Feeding Sunflower Seeds for 2026
- 7 Best Squirrel Proof Bird Feeder for Sunflower Seeds 2026
- 7 Best Bird Seed for Wild Birds That Attract Cardinals & Finches (2026 Guide)
Disclaimer: This article contains affiliate links. If you purchase products through these links, we may earn a small commission at no additional cost to you.
✨ Found this helpful? Share it with your friends! 💬🤗